100% FREE Deployment for your full-stack web application
Deploy your web app with a database, custom domain name, email, and image storage for free! No credit cards are required.

So you are done building your next unicorn startup and ready to deploy your awesome web application. Congratulations 🎉. You're in the right place. By the end of this article, we will get you up and running with a domain name, a custom professional email (e.g., welcome@my-super-awesome-app.tk) for sending emails, storage for your image uploads, deployment for your frontend & backend, and a database for sure. Let's get started.
We will not go through the process of building the web application. We already have a web application ready for deployment. I created this app, especially for this demo. So feel free to use it to follow up throughout the tutorial.
Frontend: My Super Awesome App.
Backend: My Super Awesome API.
An overview of the web app we're deploying
It's a simple web blog where users can:
- Signup using their name, email, and password.
- Upon signup, the user receives a verification email, clicks the email confirmation link, and verifies their account.
- Login with their email and password after verification.
- Post articles (with optional image uploads).
- Get the list of posted articles.
Tech stack
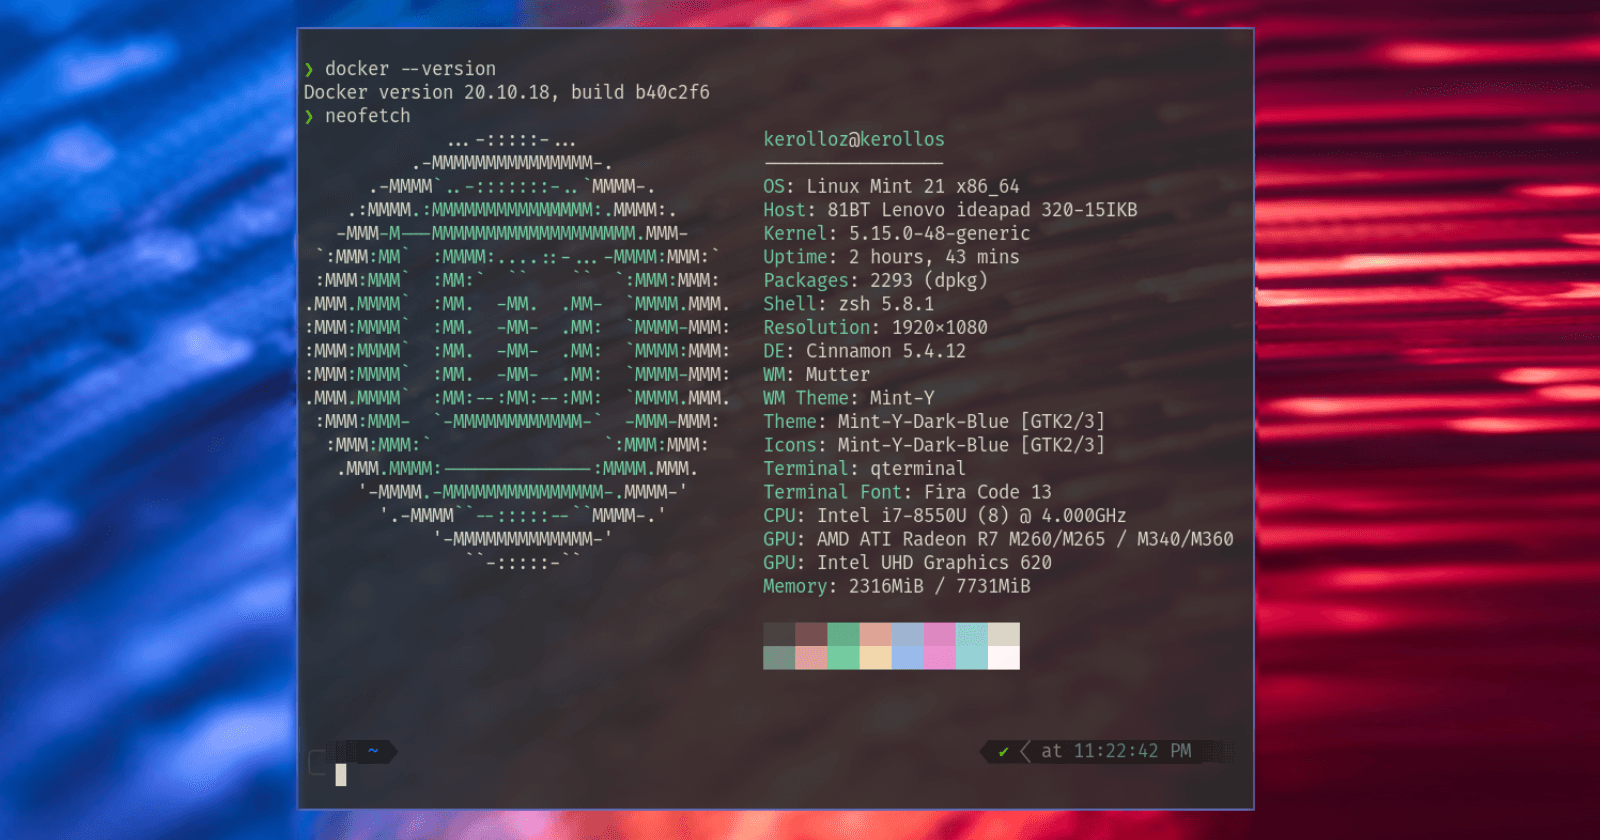
The frontend is built using Svelte. I used Tailwind for styling. I made a simple RESTful API for the backend with Node.js using Express.js. As for the database, I am using your-all-the-time-favorite database MongoDB. I am using the coolest stack ever 😎, the MESN (MongoDB, Express.js, Svelte, Node.js) stack.
Please note that using the MESN stack is unnecessary. The services we use for deployment do not require the usage of a specific stack. You can use almost any programming language, stack, or framework.
The Free Services
We're using several services that provide a free tier.
- Freenom for the domain name.
- Imgbb for image uploads.
- MongoDB Atlas for the database.
- Twilio's SendGrid for sending emails using our custom domain name.
- Render for backend deployment.
- Cloudflare for the following:
- DNS Configuration.
- Frontend deployment.
Domain Name
We will use 2 services to complete the domain name setup. The first service is Freenom, and it's where we get our free domain name from. The second service is Cloudflare. We will use the DNS management service provided by Cloudflare to manage the DNS configuration of our domain.
Let's get our domain name first from Freenom and then add it to Cloudflare. Freenom gives you a free domain for a maximum of 12 months. You can choose a domain that ends in any of these 5 TLDs: .tk, .cf, .ml, .ga, and .gq.

Freenom is the world's first and only free domain provider. Our mission is to bring people online and help countries develop their digital economies.
- Go to https://freenom.com and check the availability of your desired domain name, then click
Get it now!.
Click
Checkoutand choose the12 Month @ FREEperiod. ClickContinue.
Enter your email address and click
Verify My Email Address.
Go to your inbox and click the link to confirm your email address.

Clicking the verification link will lead you to the following page. Enter your details, check the
I have read and agree to the Terms & Conditionscheckbox, and clickComplete Order.

From
Services, selectMy Domains.
- Choose your domain and click
Manage Domain.
- From
Management Tools, chooseNameservers.
- Choose
Use custom nameservers.
We need to get these custom nameservers from Cloudflare.

Cloudflare, Inc. is an American content delivery network and DDoS mitigation company, founded in 2010. It primarily acts as a reverse proxy between a website's visitor and the Cloudflare customer's hosting provider.
Head to https://dash.cloudflare.com/sign-up and create your account. Make sure to verify your email address.

Choose the
Websitestab and clickAdd Site.
Enter the domain name you got from Freenom. Click
Add site.
Choose the Free plan and click
Continue.
Cloudflare will check if there are any DNS records associated with your domain and add them automatically. Nothing appears here since we do not have any yet. Click
Continue.
We will add the DNS records later, so click
Confirm.
Copy Cloudflare's nameservers and add them to Freenom.

Click
Change Nameservers.
After changing our nameservers on Freenom, go back to Cloudflare and click
Done, check nameservers.
Feel free to go through the Quick Start Guide. I will choose
Finish laterfor now.
The nameserver changes can take a few hours. It's usually a matter of a few minutes, but it depends. Click
Check nameserversto see if the nameserver updates have been processed and refresh the page.
If you get the following message, we're good to go.

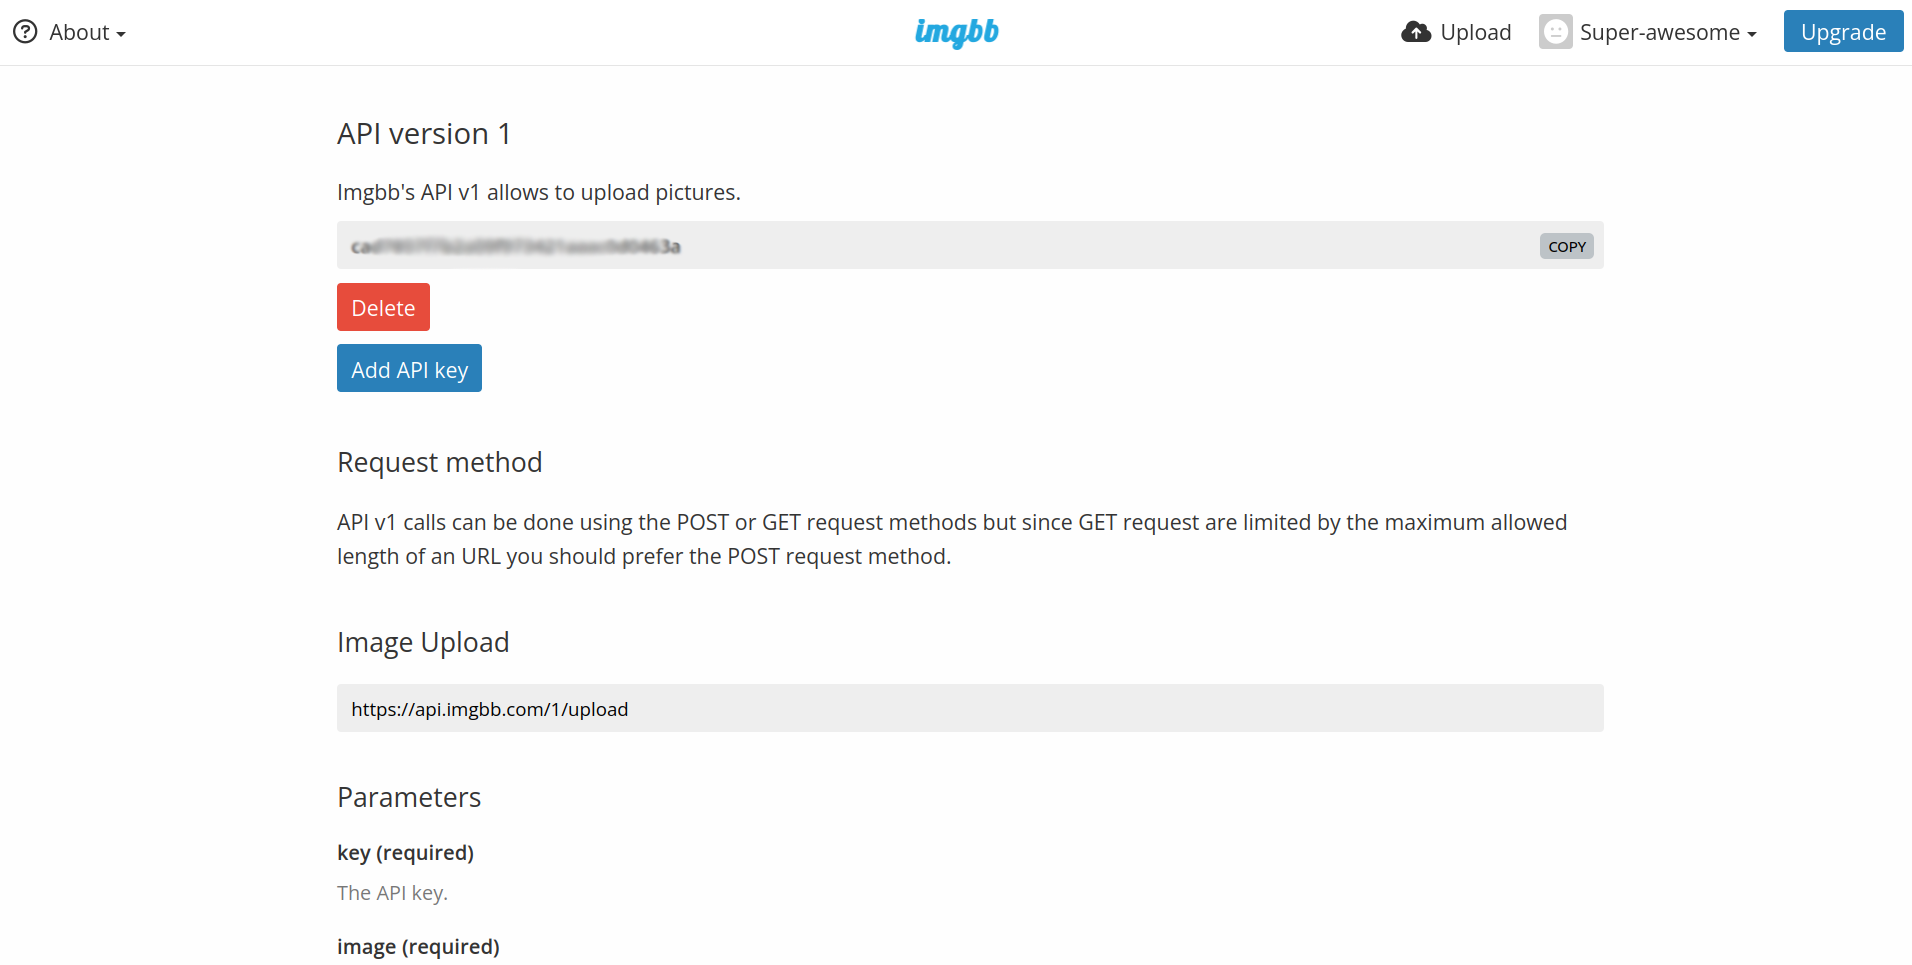
Image Uploads
![]()
Imgbb is a free image hosting and sharing service where you can get free storage for your pictures. The greatest thing about imgbb is its simple API.
- Go to imgbb and create your free account.

- You will receive a verification link in your email. Clicking the verification link will log you in automatically.

- After logging in, all we need to do is head to api.imgbb.com and click
Get API Key
- Copy the API key and save it. We will use it later when we get to backend deployment.
You can look at my code to see how I upload images to imgbb. There's an NPM package for that.
Database
We will be using the well-known NoSQL database MongoDB. MongoDB Atlas offers a free tier. The free tier has 512MB of storage which is enough for our demo.

MongoDB Atlas is a fully-managed cloud database that handles all the complexity of deploying, managing, and healing your deployments on the cloud service provider of your choice (AWS, Azure, and GCP). MongoDB Atlas is the best way to deploy, run, and scale MongoDB in the cloud.
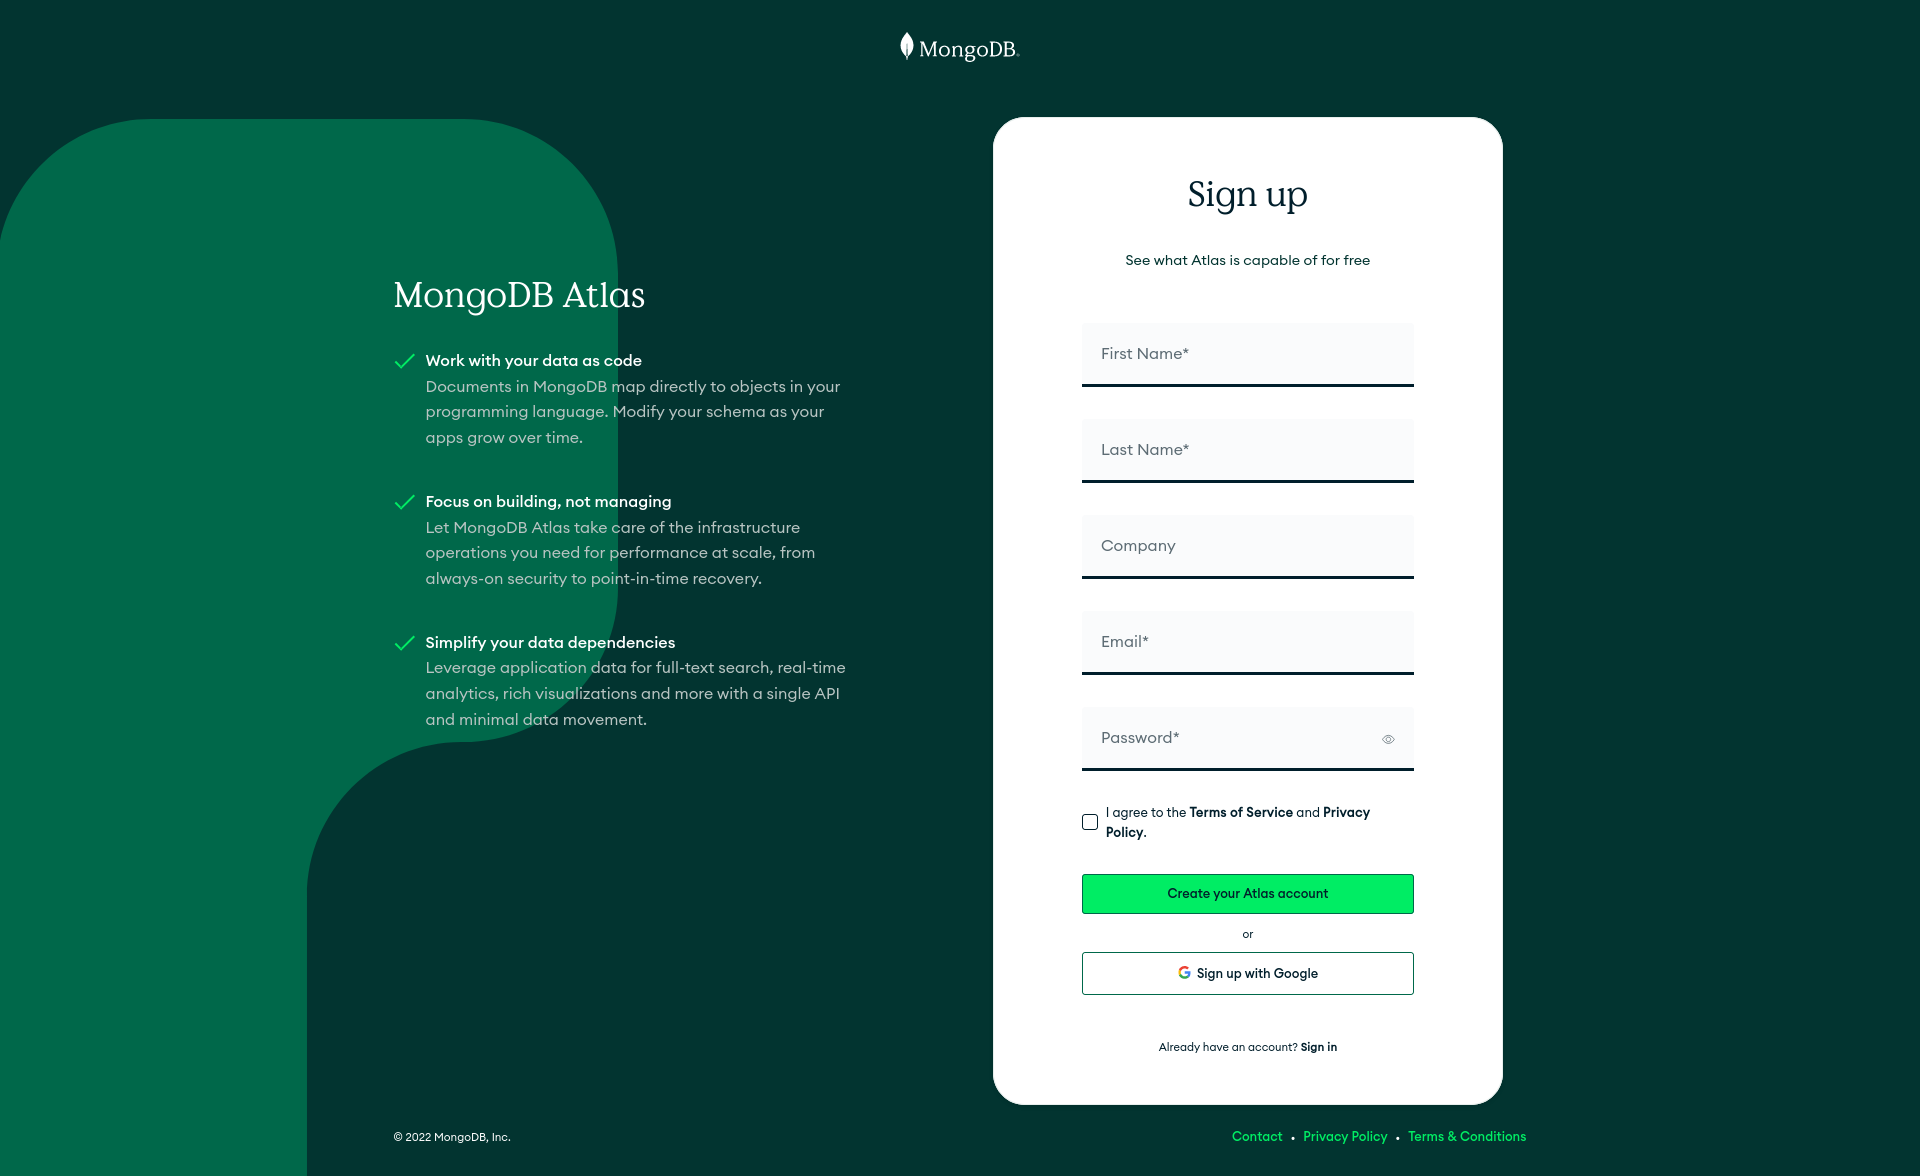
Go to https://www.mongodb.com/cloud/atlas/register and create your Atlas account.
Check your inbox and click the verification link to complete your registration.

After successfully verifying your email, click
Continue.
Complete the required info here and click
Finish.
Choose the FREE
Sharedoption and clickCreate.
Click
Create Cluster.
Choose the
Username and Passwordauthentication option and follow the instructions to create a database user using a username and password. Make sure to keep your credentials safe because we will need them later. ClickCreate User.
Go to the
Network Accesstab and clickAdd IP Address.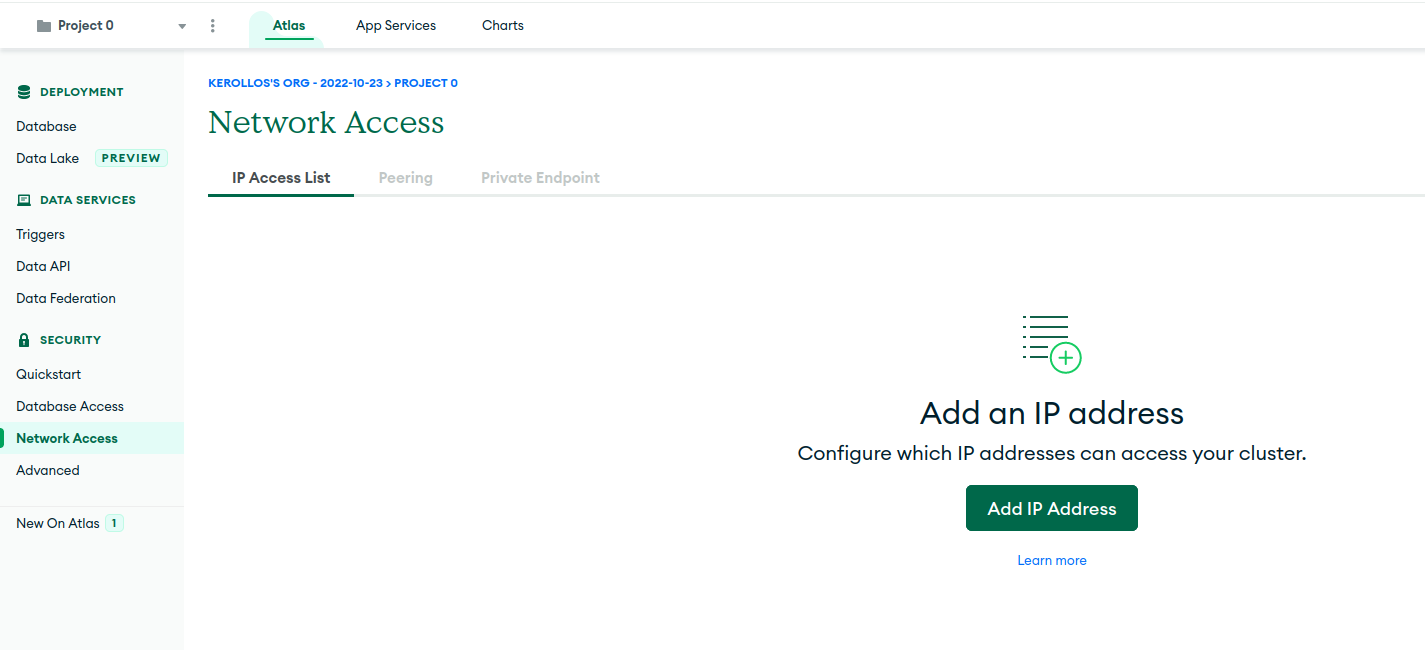
Choose
ALLOW ACCESS FROM ANYWHEREand clickConfirm. Please wait for it to finish deploying the changes to your cluster.
Go to the
Databasetab and clickConnect.
Choose
MongoDB Drivers.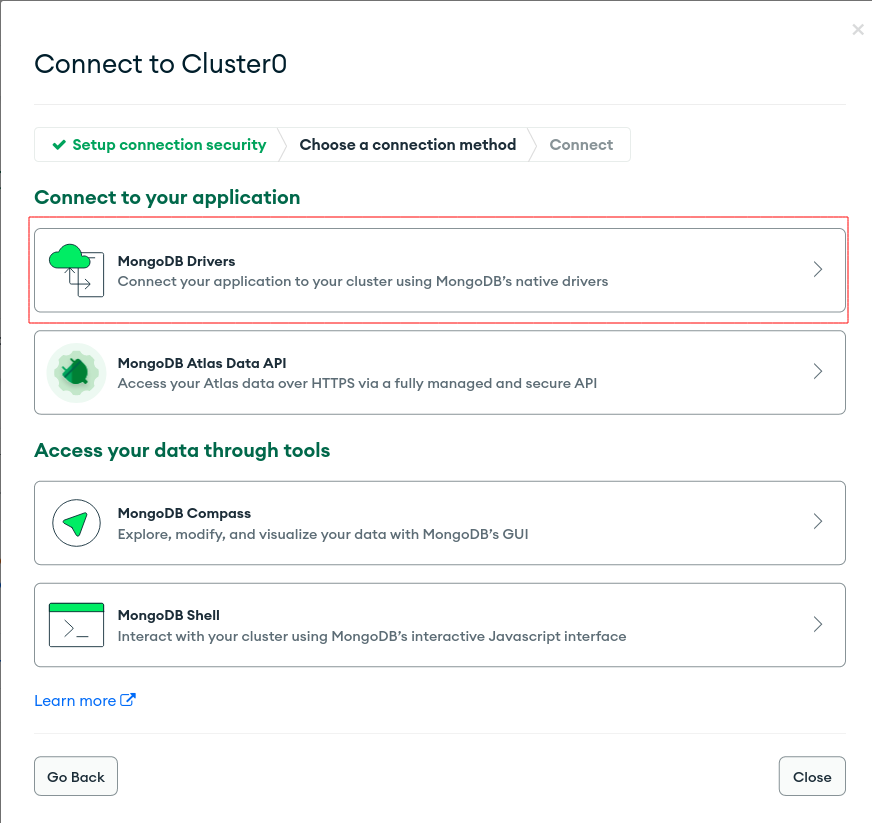
Copy the connection string and keep it safe. We will use it later during the backend deployment. Do not forget to replace the
<password>part with your password.
I use Mongoose to connect to MongoDB Atlas.
Sending Emails
We need 2 services to set up sending emails from our app (for email verification purposes). We need a Sendgrid account and a Cloudflare account which we already have. So we need to create a SendGrid account first.

SendGrid (also known as Twilio SendGrid) is a customer communication platform for transactional and marketing email.
Go to signup.sendgrid.com. Fill in your data and click
Create Account.
Complete the required inputs and click
Get Started!.
Confirm your account email address. Check your inbox for the confirmation email.

After signup, you will have the following setup guide. Click
Authenticate a domain instead.
Choose Cloudflare as the DNS host. Click
Next.
Type your domain and click
Next.
We need to copy these DNS records to Cloudflare.

On Cloudflare, go to the DNS tab on the left-side pane or click the DNS Settings link on the right-side pane.

Click
Add record. Choose theCNAMEtype, copy and paste the name and target values from SendGrid to Cloudflare, and hit theSavebutton. Make sure you toggle off the orange cloud button to tell Cloudflare not to proxy it; treat it as "DNS only".
Your DNS records should look like this after copying the values from SendGrid to Cloudflare.

Back to SendGrid, check the
I've added these recordscheckbox, and clickVerify.
The following message should appear.

Now, we need to get our API key from SendGrid. Go to https://app.sendgrid.com/settings/api_keys. Click
Create API Key.
Enter your API Key Name, then hit
Create & View.
Copy your API key and save it for later. Click
Done.
This is how I use SendGrid to send emails.
Backend
Now we're ready to deploy our backend code. We've got what we need:
- ImgBB API key for image uploads ✅
- MongoDB Atlas connection string for the database ✅
- SendGrid API key for sending emails ✅
We will use Render to deploy our backend API. I used to deploy my apps to Heroku but, unfortunately, free Heroku is not an option anymore.

Render is a unified cloud to build and run all your apps and websites with free TLS certificates, a global CDN, DDoS protection, private networks, and auto deploys from Git.
Go to https://dashboard.render.com/register and create an account.

Check your inbox for the verification email.

You will be logged in after clicking the link in your email. Click
New Web Service.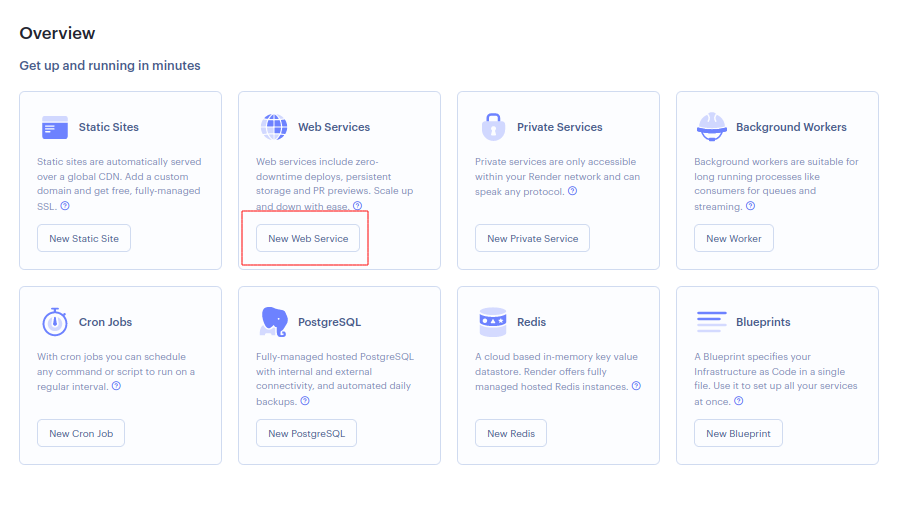
You can choose a public git repository or connect to GitHub or GitLab and choose one of your repositories.

I chose a repository from my GitHub account.

Add a unique name for your web service. You can edit the other configs, but in my case, I will leave it as is.

Scroll down to the bottom and click
Advancedto set the environment variables required for our API to run properly.
There are two ways to accomplish the same goal (adding env vars). You can click
Add Environment Variableand add them one by one, or clickAdd Secret File(a .env file in my case because I have it loaded automatically on API startup).
I will choose
Add Secret File. Add filename and file contents, then clickSave.
Click
Create Web Service.
You might want to read about free plan limits on Render while it's deploying our API.

It's LIVE! Our API is up and running now. Only one more thing to do. Go to the
Settingstab.
Scroll down to Custom Domains and click
Add Custom Domain.
I want https://api.my-super-awesome-app.tk to be the custom domain for the API. Click
Save.
Follow the instructions and add the CNAME record to Cloudflare as we did earlier with SendGrid. For further info, see https://render.com/docs/configure-cloudflare-dns.

On Cloudflare, go to DNS settings and add the CNAME record. Click
Save.
Now go back to Render and click
Verify.
You should see that it is
Verifiednow.
Frontend
To the final step 🥁. We will deploy the frontend part of My Super Awesome App. As we mentioned at the beginning of the article, we will use Cloudflare Pages to deploy our frontend. Cloudflare Pages is part of your Cloudflare account, so there are no more registrations.

Cloudflare Pages is a JAMstack platform for frontend developers to collaborate and deploy websites. Build fast sites. Deploy frontend applications in record time.
Head to https://dash.cloudflare.com/?account=pages. Click
Create a project.
You have various options to deploy your frontend, but the super awesome frontend is available on GitHub so I will go with that.

Choose your frontend repository. Click
Begin Setup.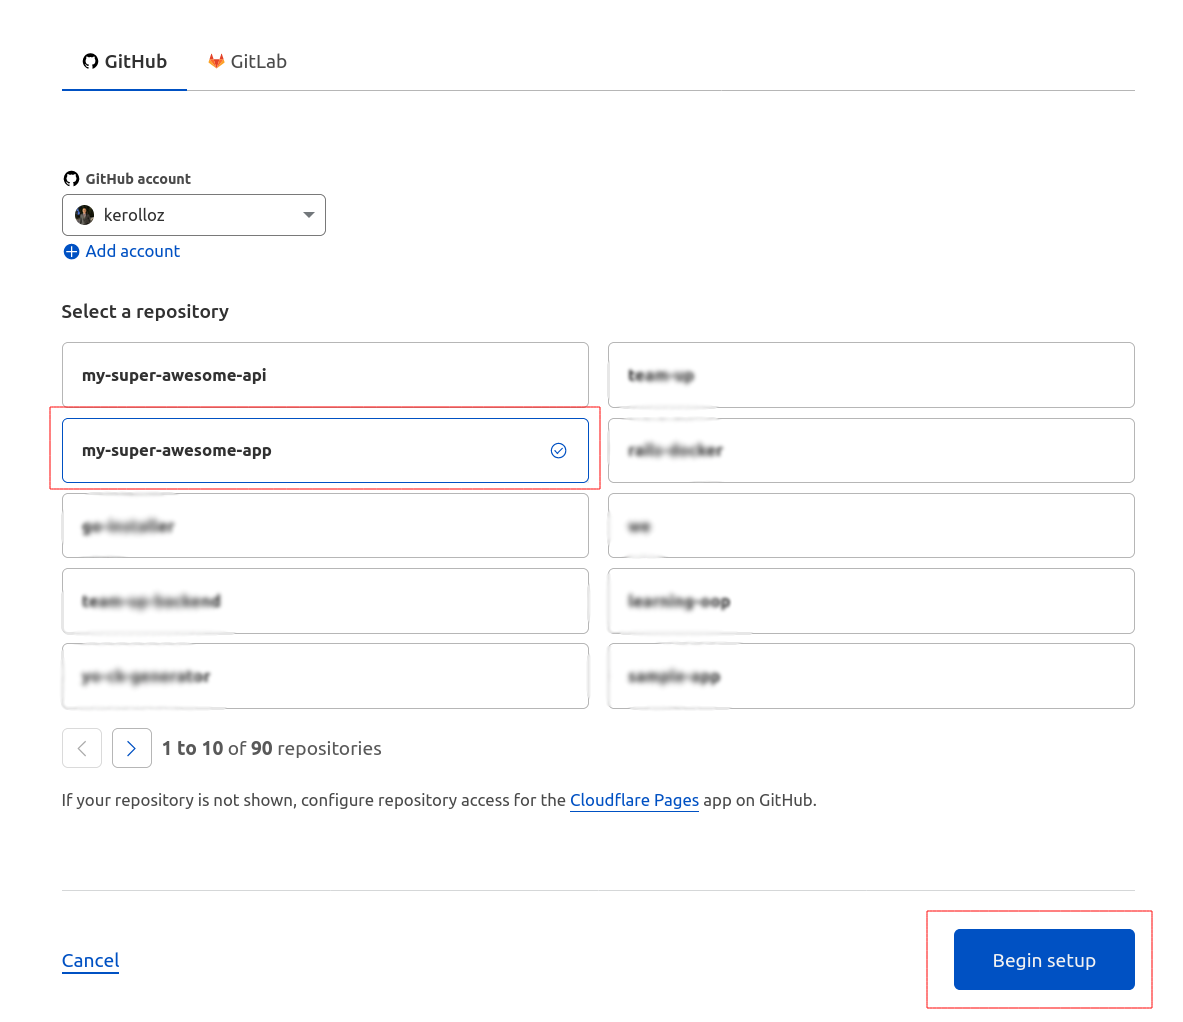
Change build settings to fit your case. In this case, I set the framework to
Svelteand the output directory todist. I also added 2 env vars to set the base API URI to which the frontend will send requests and the NodeJS version to be used during the build process. ClickSave and Deploy.
After a successful build, you should see the following. Click
Continue to project.
The last step here is to link our frontend to our domain. Click
Set up custom domain.

Add your custom domain name and click
Continue.
Click
Activate domain.
Woohoo! 🥳 Our frontend is now connected to our custom domain https://my-super-awesome-app.tk.

Go to https://my-super-awesome-app.tk and see the app come to life ✨. Congratulations on deploying your full-stack app for FREE. I hope you enjoyed this tutorial. I can't wait to hear your feedback and feel free to reach out to me if you get stuck on any step.
P.S. If you reached the end of this article, you are a Super Awesome Human Being ❤️.